Basement Renovation in a 1961 Home
My wife and I bought our 1961 house in 2019, and it came with a basement in pretty rough shape. It smelled musty. There was evidence of moisture damage. The slab was cracked along the perimeter of the exterior walls. The old 1960s wood paneling was depressing… You get the idea. And now, finally, our basement renovation has begun!
Getting ahead of myself
I wanted to start on the basement renovation quickly, but I had a few other things in line before it: new Mitsubishi heat pump; replacing the soffits, fascias, & gutters; and a new heat pump water heater, to name the biggest ones. But then the pandemic hit, and I started writing a book.
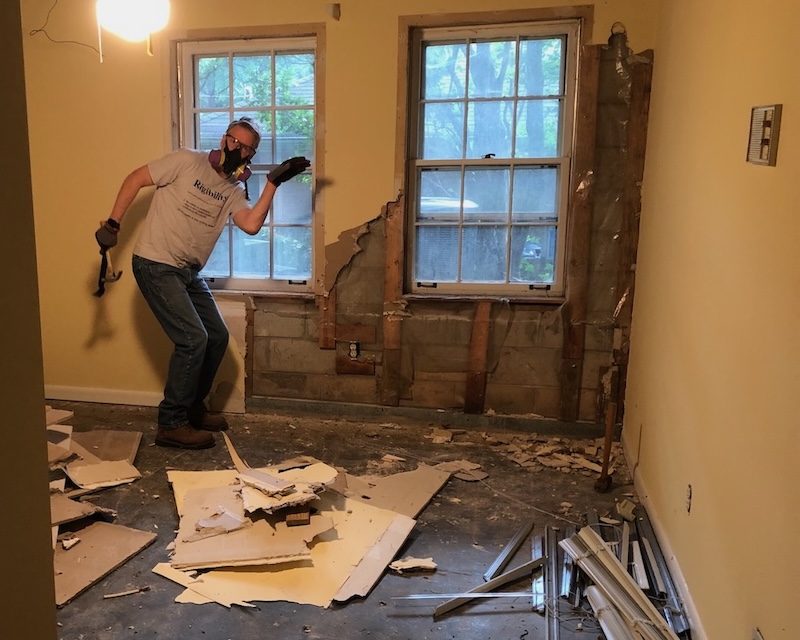
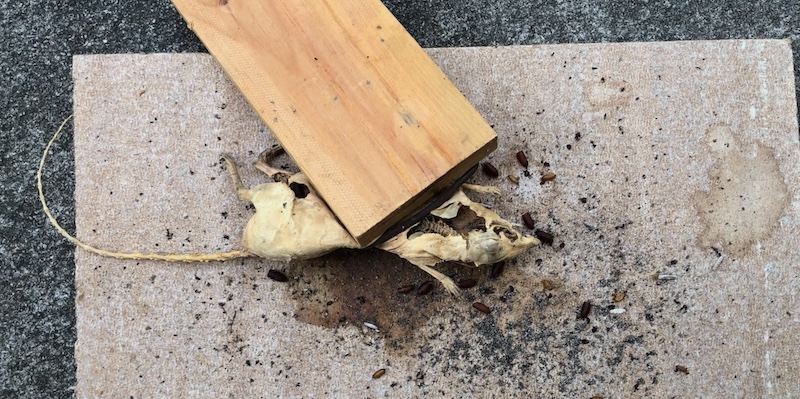
But I couldn’t stop myself from doing something down there. I tore apart one of the basement bedrooms (above). I removed some of the acoustic ceiling tiles. I found a dead rat that had been caught in a trap on top of one of those ceiling tiles (below).
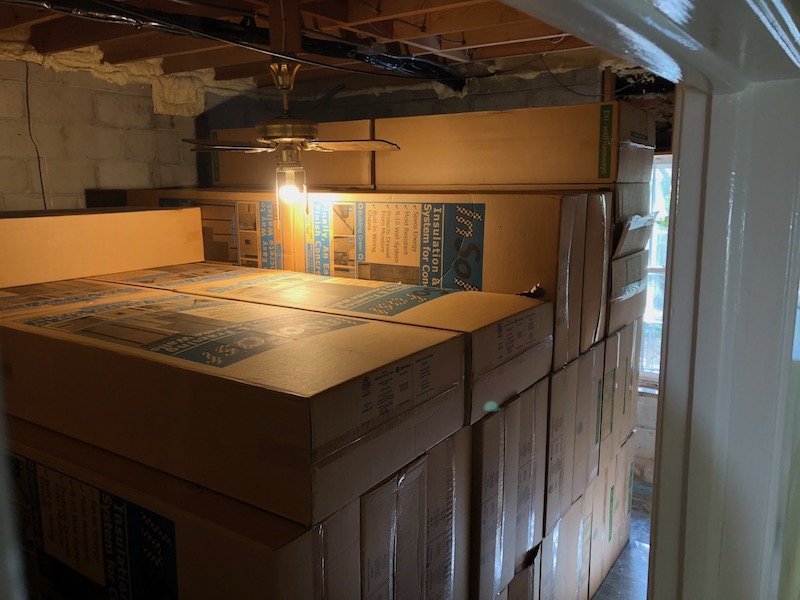
And I also bought a bunch of InSoFast insulation panels to install on the basement floor and exterior walls and got a primo energy recovery ventilator donated by my friends at Zehnder.
Unfortunately, all of my desire and initial forays didn’t get me very far. Last year, though, we finally began our basement renovation in earnest.
Making a detailed plan
I built a house in 2001, and that forced me to learn the importance of having as much of a construction project as possible planned in advance. So we had Chuck Clark, an Atlanta architect, draw up plans for us.
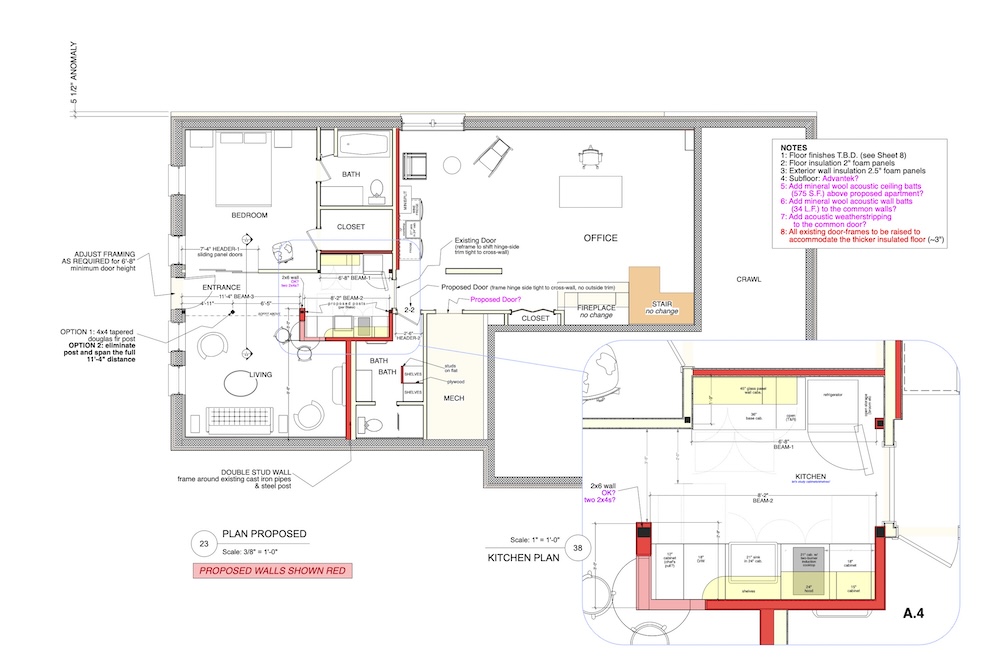
You can see the new basement floor plan below. On the left side, the two existing bedrooms are turning into a small apartment. On the right side, the main room is going to get upgraded with insulation, new finishes, and a window. We’re doing all this in two phases to minimize disruption to the living space above. The apartment is first, then the main room.
Also, I’ve done the heating and cooling load calculation and design for the basement system. It’s going to be a Mitsubishi heat pump with two indoor units. The apartment will get a low-static ducted air handler, like the ones in my attic. The big room will get a wall-mounted ductless unit.
I’ll post more about the design details as the project moves forward.
Demolition, asbestos abatement, and more problems uncovered
We finally got the physical work started with demolition and asbestos abatement on Friday, 9 February. The abatement company, American Environmental Management Services, started with a couple hours of prep work, sealing off the work area from the rest of the basement and putting high-powered fans in the windows to keep a negative pressure in that area.
Then they dove in and spent a long day removing drywall (with asbestos in the joint compound), ductwork (with asbestos in the tape), and some other stuff, too. We were down to the studs when they left. The next day, an engineer came to test the air, and it was all clear.
After that I got to see what was going on behind those finished surfaces. The video above gives you an idea of how bad it was.
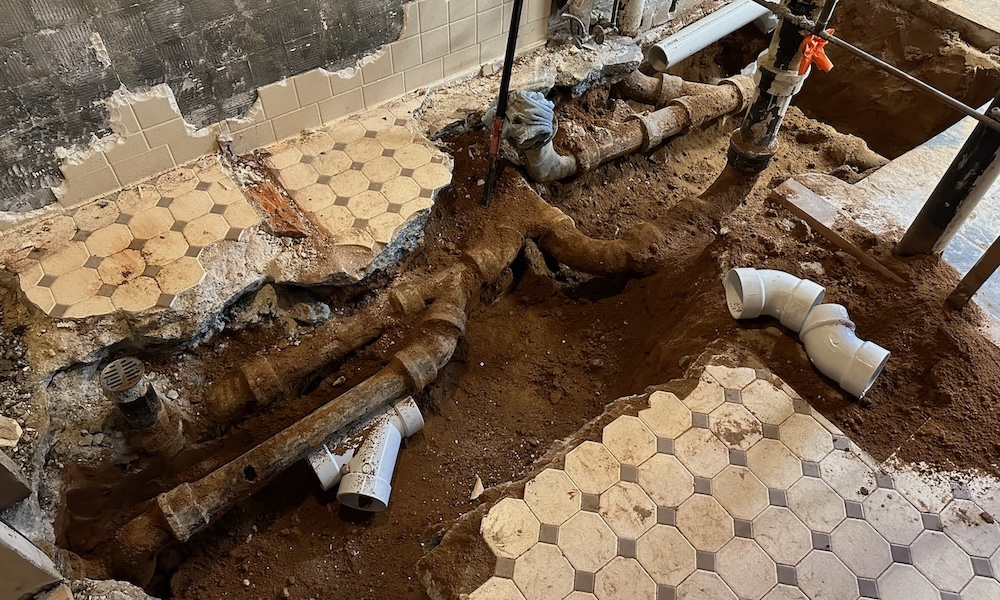
Replacing plumbing drains
Following the demolition work, the plumbers (PV Heating, Cooling, & Plumbing) came in last week. The dug up a chunk of the slab—and confirmed for me that there’s no gravel or plastic beneath it, and no rebar or wire mesh either. The original cast iron pipes were a mess…literally. Here’s what one of them looked like.
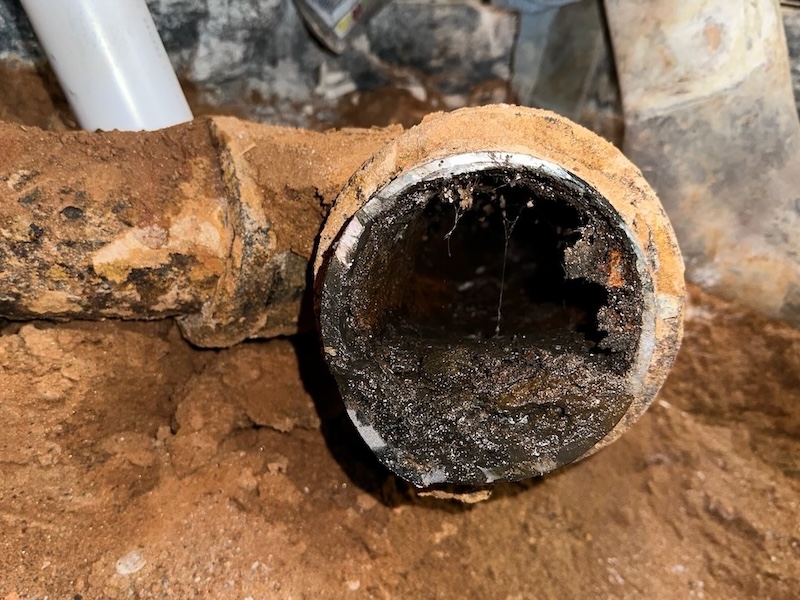
The design was a mess, too. There were a lot of extra turns as one of the pipes went away from the main drain, did a 180 degree turn, and then connected to the other side of a drain feeding into the main.
But the plumbers also brought in an excavator to replace about 10 feet of drain pipe in front of the house. This was (at least) the second time that part had been replaced. The previous time, it connected to the next pipe going out to the street but wasn’t supported properly. The soil load above caused the pipes to shift, creating an offset. The new pipe is adequately supported and should last a long, long time.
Replacing interior perimeter drains
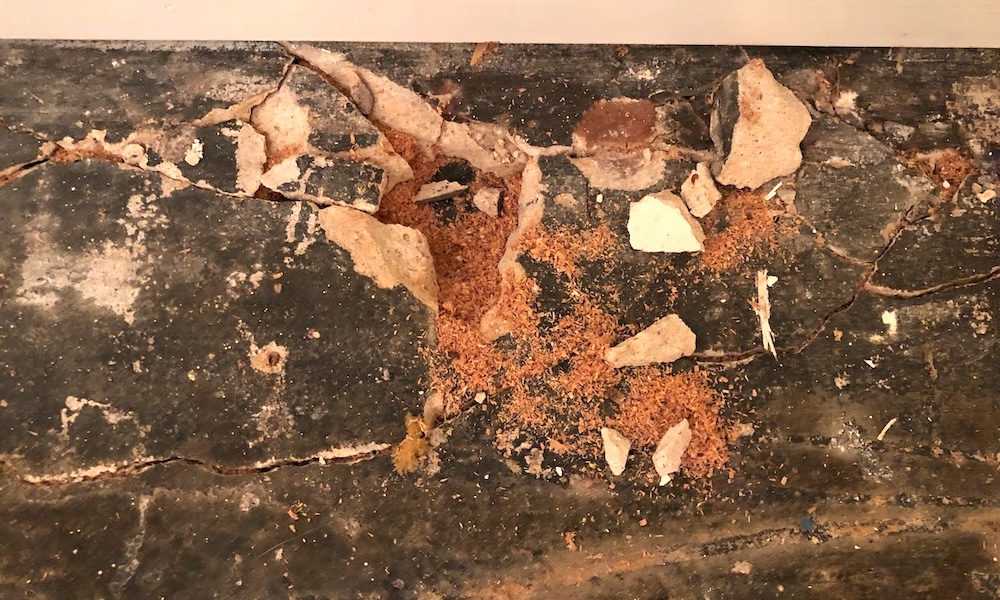
This week another contractor came in to move the project along. I noticed shortly after we bought the house that the basement slab was cracked all along the perimeter, at least where I could see it (photo below). It turns out a previous owner had an interior perimeter drain installed, probably in the 1970s, and they didn’t do a great job.
So Engineered Solutions of Georgia started yesterday and is about to wrap up their work as I finish this article. They’ve removed the old drain, installed plastic on the walls to capture any water that comes through, put in the new drain, and connected it to a sump pump in the mechanical room.
The video above shows some of the plumbing and interior drain work we’ve had done.
Upcoming tasks
We’ve made a lot of progress in less than two weeks, and now it starts getting more fun. Our remodeling contractor, Blake Brewster of Brewster Builders is about to take over with the structural work that needs to happen. Then back to me for the floor and wall insulation and air sealing. After finishing that, we’ll get the nonstructural framing done, rough in the new heat pump, and get that beautiful new Zehnder ERV installed.
Stay tuned! This basement renovation of my old house is just getting started.
Allison A. Bailes III, PhD is a speaker, writer, building science consultant, and the founder of Energy Vanguard in Decatur, Georgia. He has a doctorate in physics and is the author of a bestselling book on building science. He also writes the Energy Vanguard Blog. For more updates, you can subscribe to Energy Vanguard’s weekly newsletter and follow him on LinkedIn.
Related Articles
7 Reasons to Gut Your Bathroom When You Remodel
Uncovering the Secrets of an Old House
My Undersized Ducted Mini-Split Heat Pump
Faster Hot Water Can Change Your Life
Comments are welcome and moderated. Your comment will appear below after approval.

Could you share the product Engineered Solutions of Georgia used on the walls?
Brian: It’s corrugated plastic, the same stuff used for yard signs. It comes in 4’x8′ sheets.
Thanks. Thats an interesting solution. It looks like the seams are taped too. Did they tape it to the sub-slab vapor barrier too? I’m looking for a similar solution for a stone foundation I have in my basement. I’d like to seal it to the mud sill and the stego vapor barrier that will be under the slab.
Side note Energy Vanguard is designing my HVAC system for my house right now!
Quite the project! A lot of contractors will be able to send their kids to excellent schools because of the work they are doing in your home 😀.
I can’t help but think of hidden conditions in aging homes across the country…and around the world? Out of sight, etc.
Good to see you wearing that respirator. Stay safe!
Steve: Well, they’re going to need a lot more than this one job to send their kids to Princeton or Cal Tech.
Yep, our homes and other buildings are laboratories for materials and products…and people.
Oh my, Allison! Every home reonvation is an adventure, with discoveries around every corner, each resulting in an increase in the cost of the project. No news there. But, wow, you seem to have hit the jackpot on this one! Hope your book sales and speaker fees continue to fund this “great content” for your website and YouTube channel.
All the best,
Bill Hill
Good luck Allison. We are on our 6th house renovation and the surprises just-a keep on coming. Our current one – the final-final retirement one, is only 20 years old and we hoped that the amount of renovation and resultant surprises would be minimal – (cut to a video of a bunch of monkeys laughing hysterically). I look forward to your updates so I can help by sharing your pain, and maybe post a few “you think that is bad?” photos.
InSoFast panels? I believe that I recall an article you once wrote about insulation belonging on the exterior of a basement wall. What was the thought process in deciding to insulate the interior face?
My guess is it was the inconvenience and disruption of excavating around the outside of the house.
Oh how the trade-offs never end when undertaking this type of an effort.
Best of luck in moving forward.