A Weekend Zehnder ERV Installation Blitz
You may recall that in 2021 Zehnder America gave me one of their premium energy recovery ventilators (ERV) with all the components I needed to get it up and running in my house. It’s taken longer than I wanted to install it, but I made huge progress recently. Three friends who all used to work for Zehnder America recently came to Atlanta to spend a weekend helping me with my Zehnder ERV installation. Here’s how it went, along with some tips for your installation.
The basics of the Zehnder ERV system
The Zehnder energy recovery ventilator (OK, it’s actually an enthalpy recovery ventilator, but let’s keep it simple here) provides an efficient way of bringing outdoor air into your home to dilute the indoor air pollutants. But it also exhausts air from indoors at the same time. The two air streams pass by each other through the capillary core in the ERV, exchanging heat and moisture.
In plain language, it doesn’t hit you with blasts of cold air in winter or hot humid air in summer. The cold winter air gets warmed up on its way to you by the heat exchange that happens in the core. The hot humid summer air coming in gets pre-cooled and dried out a bit on its way in. But remember: Ventilation is only one part in a layered approach to good indoor air quality.
Now, one of the really nice things about the Zehnder ERV is that it’s a complete system. It includes the all the stuff you need to pull in outdoor air and distribute it throughout the house as well as extract stale air from the house and send it outdoors. This system also has some nice controls to adjust the air flow, boost the flow when needed, and more.
The distribution system is clever. You have two big ducts connecting the unit to the outdoors. On the house side of the air flow, there are two manifolds with built-in silencers. The unit connects to them with large ducts on one side. On the other side, as you’ll see below, are a bunch of ports for smaller tubes that connect to the vents that extract or supply air from or to the rooms.
Got that? If not, follow along and it should start making more sense.
Getting started
My three friends—John Rockwell, Chris Smith, and Aubrey Gewehr—arrived at the airport Friday evening, and we kicked things off by going to dinner at Manual’s Tavern. The next morning, I picked them up at their Airbnb, and my wife Elaine fed us all a big breakfast.
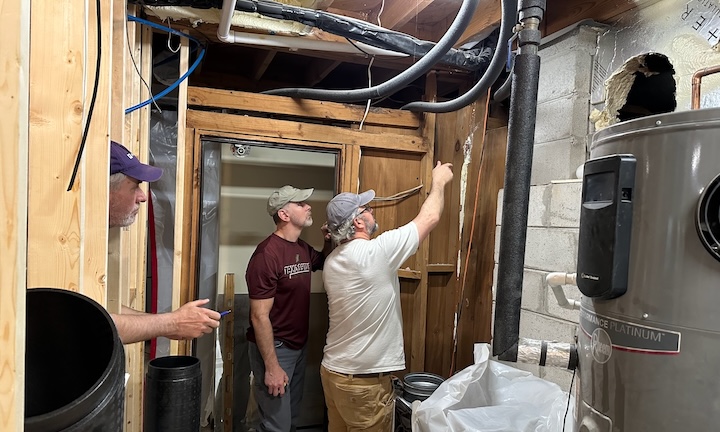
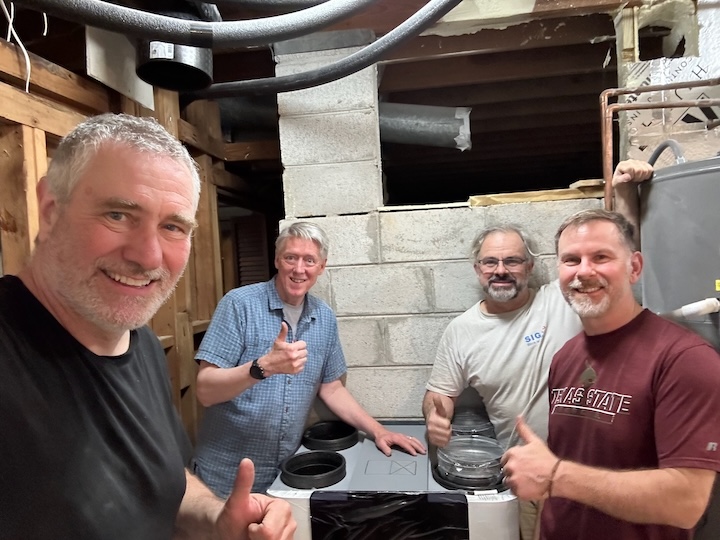
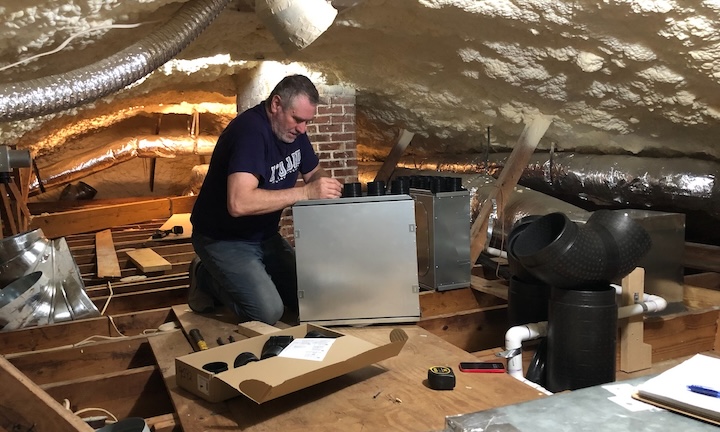
Then it was planning time. Above you can see we were all in the mechanical room scoping out where to set the equipment, how to run ducts to the outdoors, and how to get ducts up to the attic. From left to right, that’s John, Chris, and Aubrey.
At that moment, we were trying to figure how to run ducts to the attic. We had a couple of chases to use, but first we had to do some demolition. The old furnace flue was still in one of the chases, so we had to get it out.
We did some other things I haven’t documented here as well, such as moving a PVC condensate line that was in the way, installing some of the ceiling vents, and preparing materials.
The big accomplishment of day one
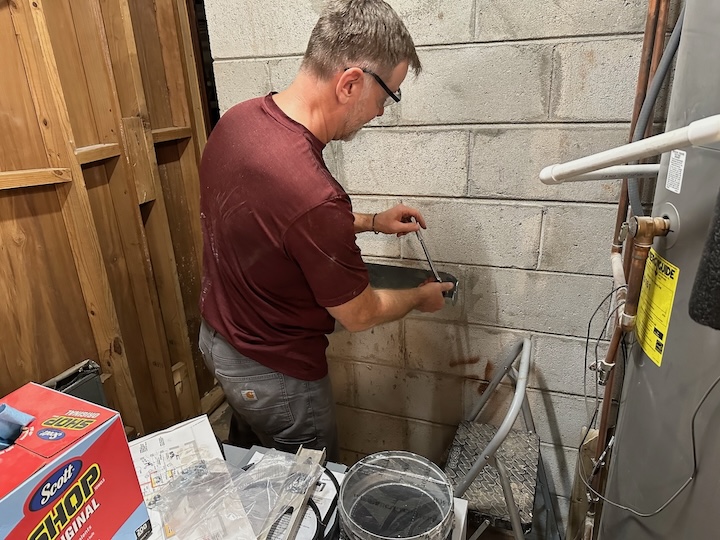
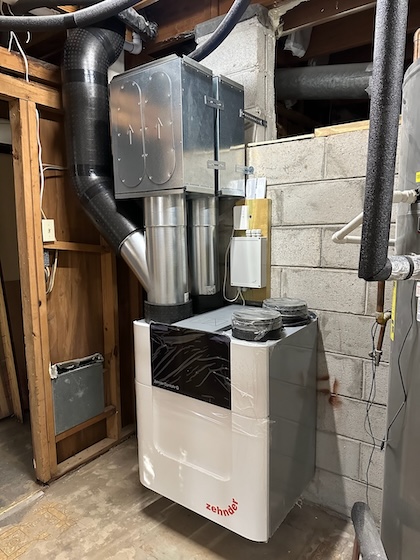
About the last thing we did on day one was to mount the ERV on the wall. The photo above shows Chris bolting the bracket to the block wall to hold the unit.
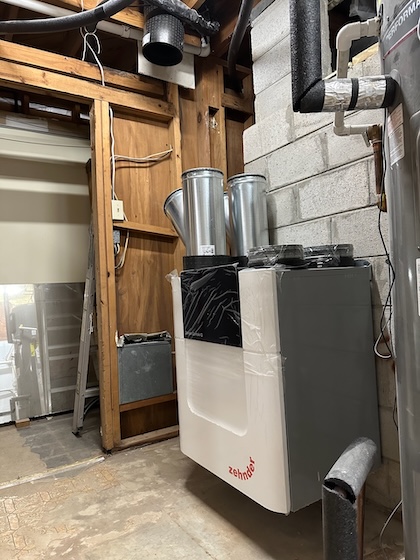
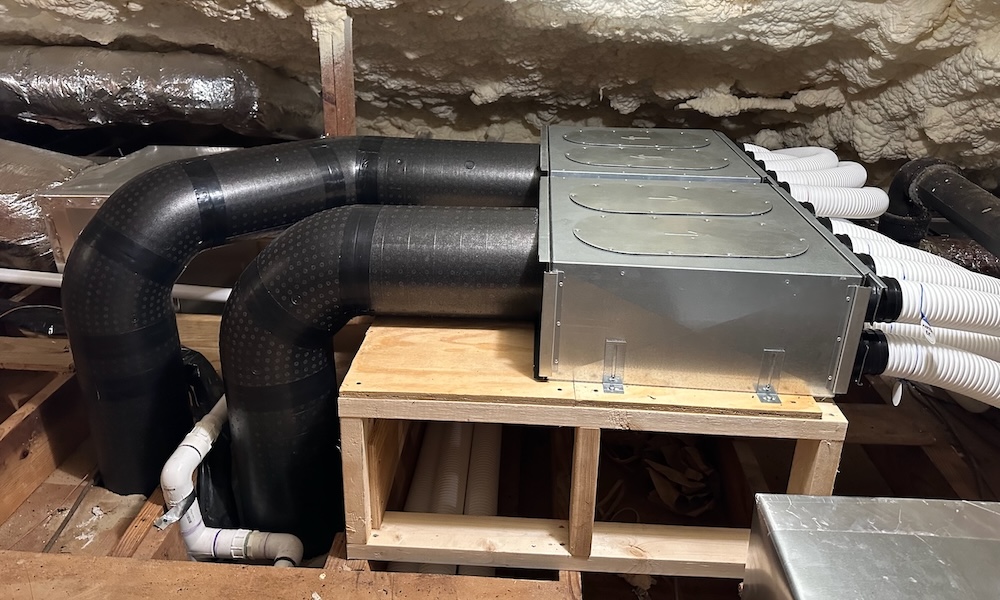
The ERV is the heart of the system, and here’s what it looked like at the end of Saturday.

After achieving that milestone, we celebrated with a pitcher of our favorite cocktail: the Negroni. That’s Aubrey doing a great job imitating the face on the pitcher as my stepson looks on.
Connecting basement unit to attic ducts
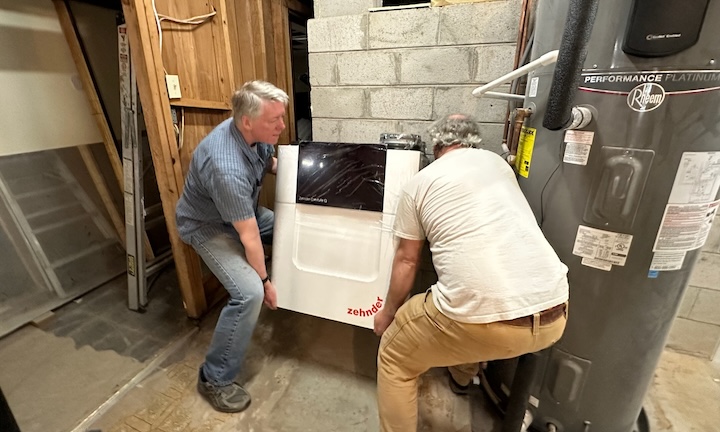
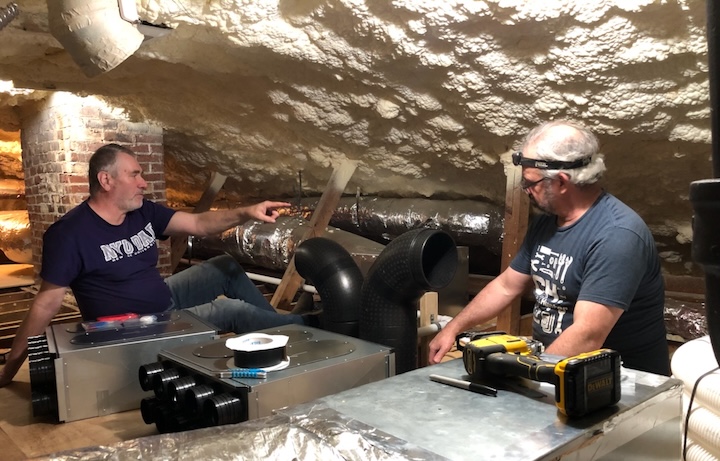
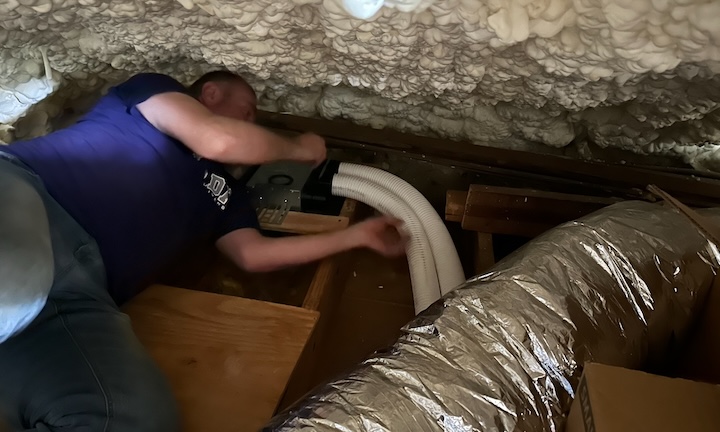
Sunday morning came, and we were back at it. We got the chases cleared out the day before and had installed some the expanded polypropylene ducts. Now we were connecting vertical pipe over to the unit hanging on the wall. That meant using a lot of the 45 degree elbows that came with the system.
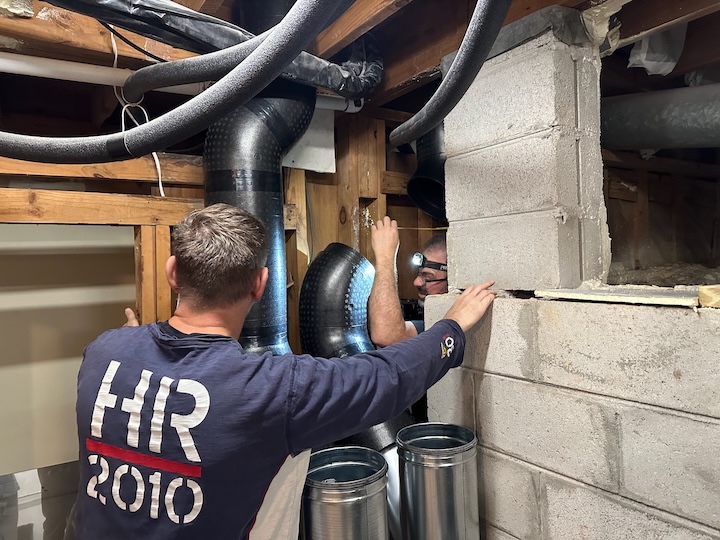
Chris and Aubrey are making connections in the photo above.
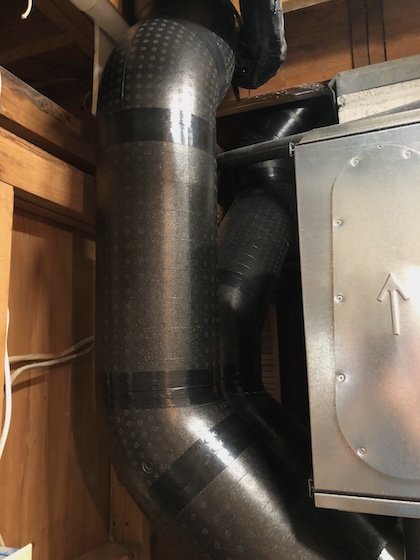
Once it was all connected in the basement, the two ducts came down the chases, turned, and went into the unit (not visible in above photo) at a 45 degree angle. The metal box you see to the right of the black ducts is one of the basement manifolds. It’s pretty neat installation, I think.
The ComfoWell manifolds
Speaking of manifolds, that was another thing we got installed. In the basement, the two manifolds mounted directly on top of the unit. They sit on top of the vertical section of the wye coming out the top left side of the ERV. You can see them right above Aubrey with the pitcher above and in the second-to-last photo at the bottom of the article. In the attic, we did things differently.
But before mounting the manifolds in the attic, John assembled them. One end has a plate with a big hole for the big duct. The other end has a plate with a bunch of small holes for the small ducts (called ComfoTube).
You may be wondering about the two sets of manifolds. The layout basically has two branches, one for the basement and one for the main floor. The manifolds in the attic serve the main floor, and the ones in the basement serve the basement. But it’s not like a zoned heating and cooling system because they’re not controlled separately.
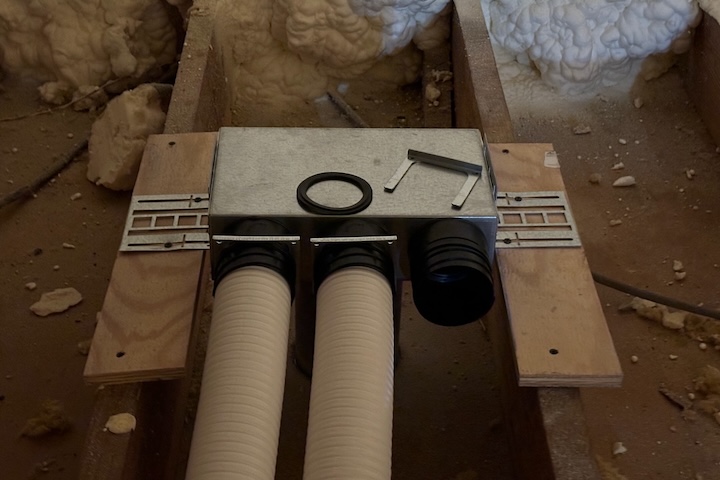
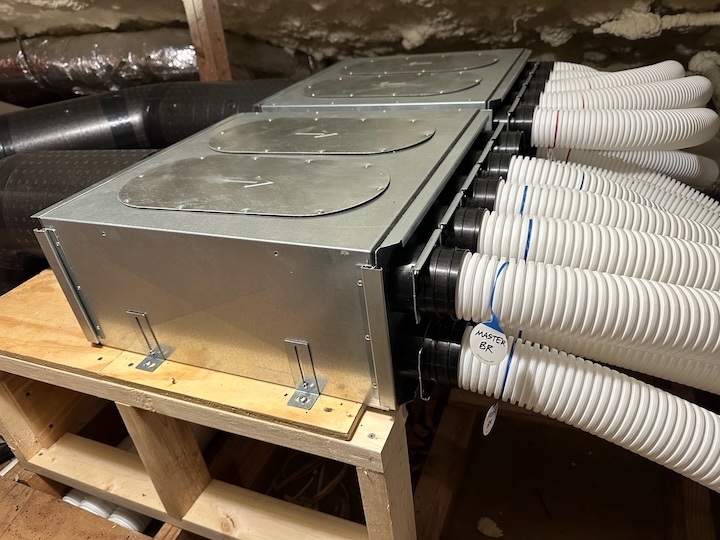
When we had the basement and main floor ceiling vents done, we all went to the attic and discussed possible ways to mount the manifolds. In the end, we decided to build a platform that would hold both manifolds horizontally, as you see below.
The big ducts come up from the basement on the left. The small ducts come out of the ports on the right. Once we figured out how to do it, it went together quickly.
Ceiling vents
When John put together the quote and materials list for me, he started with the air distribution schedule. It shows the rooms in the house, where the stale air gets extracted, and where the outdoor air gets supplied. That’s it below.
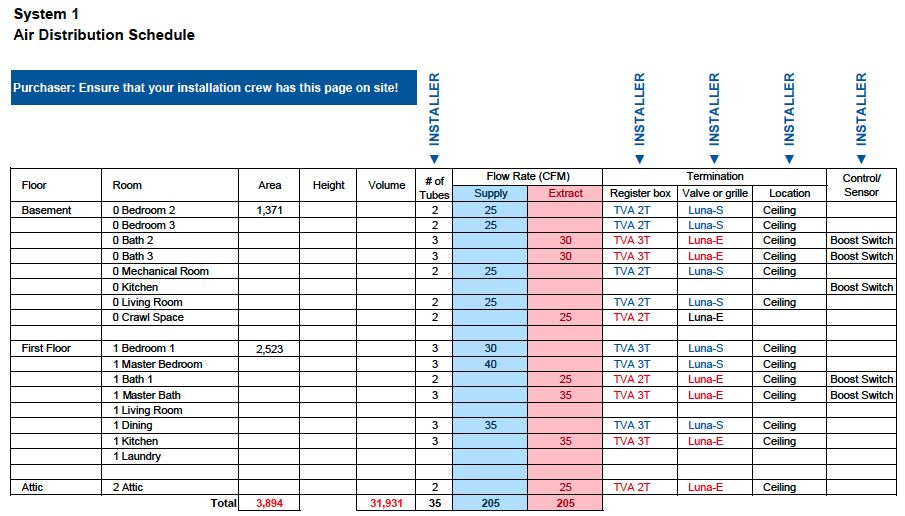
You can see the two branches (Basement and First Floor), the rooms, the number of tubes to each vent, and the air flow rate (in cfm) for each extract (red) and supply vent (blue). On the right side, you can see the size of each register box and type of vent.
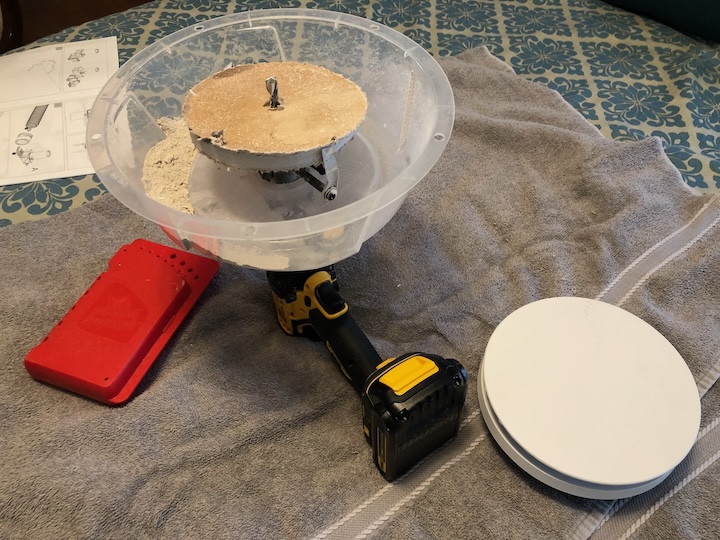
Now, one of the fun parts was setting the register boxes and attaching the vents. We used the hole saw you see above.
Tip: To cut the holes in the ceiling, get a hole saw with a plastic dust catcher like the one shown above. It makes cleanup a lot easier. (That disk in the middle is the circular piece of drywall cut out of one of the holes.)
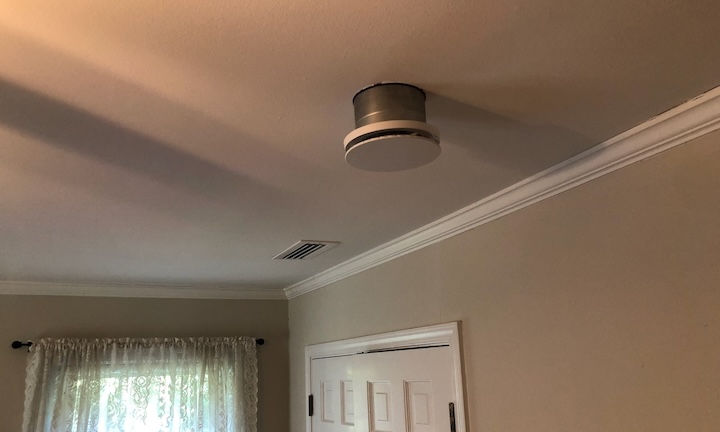
The photo above shows the ceiling vent connected to the register box duct but hanging well below the ceiling. That’s not how you want it when it’s done. The duct extension has extra length, so you have two options: (1) Attach the register box where it’s convenient and cut off the excess duct, or (2) set the register box at the right height to make the bottom of the duct flush with the ceiling.
Tip: Cutting off excess duct is best avoided because it’s extra work and leaves a sharp edge. Also, getting the register boxes a bit higher in the attic makes attaching the ComfoTubes easier.
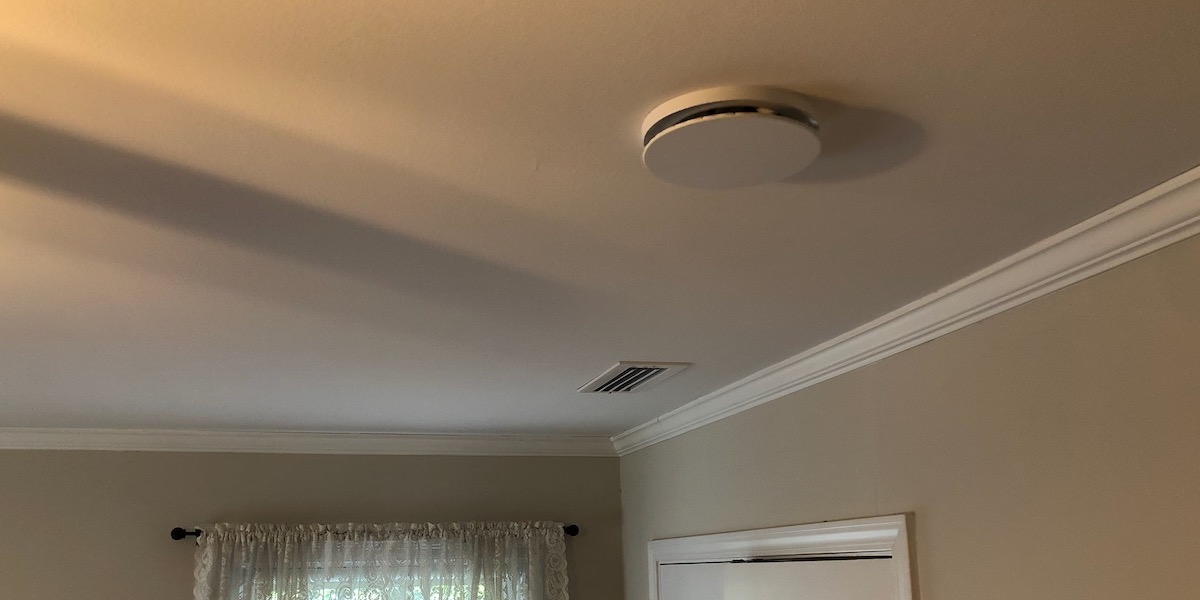
Here’s what the ceiling vent looks like when it’s done.
Connecting the ComfoTubes
Once the manifolds and register boxes are in place in a Zehnder ERV installation, connecting the tubes goes pretty quickly, especially if you have four people helping. If you look at that register box two photos above, you can get an idea of how it works.
The tubes and the black connectors have ridges and grooves. You put a rubber O-ring in a groove on the ComfoTube and then slide the tube into the connector. Once it’s seated, you take that three-sided metal clip and slide it down into a groove in the connector to secure it.
You do that for each tube going to all the register boxes, as John is doing above. And you connect the other end to the manifold, as Aubrey is doing below.
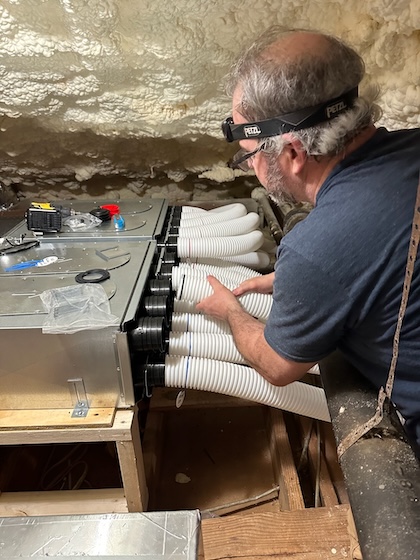
When it’s all connected, the air can move easily between the ERV in the basement and the vents all over the house.
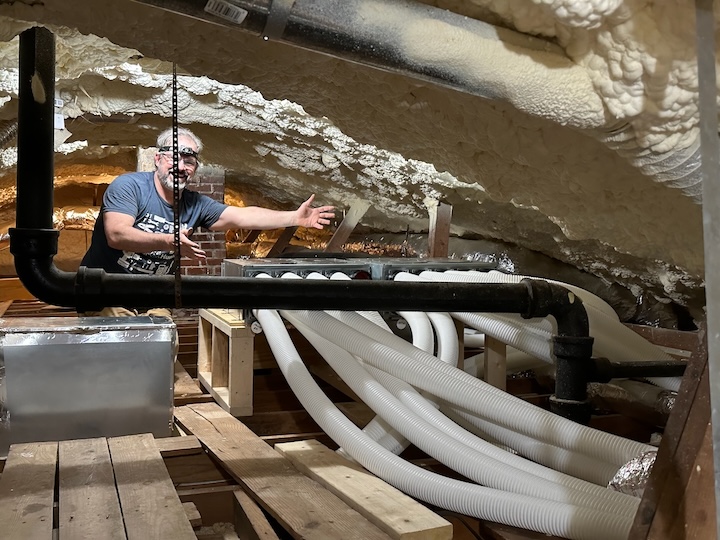
The three coming out and turning left go between the joists and then go back to the other side of the house. Since I have a conditioned attic with no insulation in the attic floor, my joist cavities are available for this.
Also note that each tube going into the manifold is labeled with the room it’s going to.
Finishing up
At the end of the second day of my weekend Zehnder ERV installation blitz, we had all the main floor ducting complete. Then we went back to the basement. The last thing we did was install the controls on the wall above the unit and wire it up. Actually, John and I watched as Chris and Aubrey wired it up.
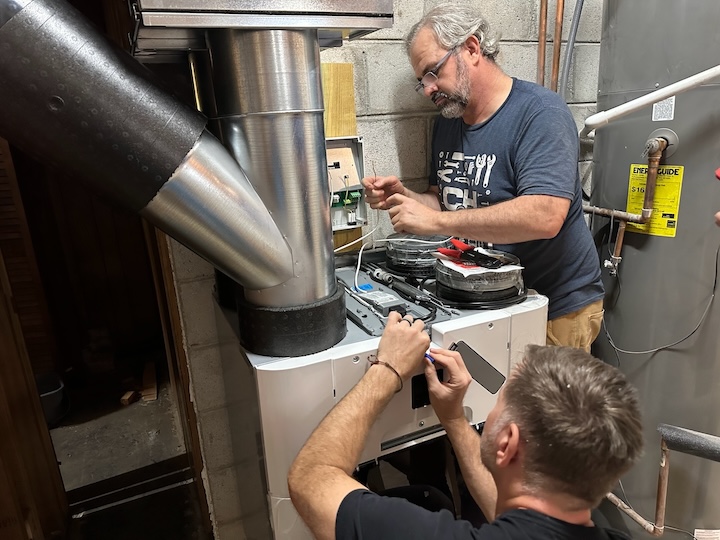
At the end of the weekend, the unit was hanging on the wall, completely connected to all the main floor ceiling vents, and wired up.
And there was much rejoicing, with more Negronis, chips and salsa, and another great dinner prepared by Elaine.

Final thoughts
I’d say the system is about 75 percent complete now. The two main things I need to do before we can fire it up is install the 240 volt outlet nearby and connect the ducts to the outdoors. To be able to use the boost mode in the bathrooms and kitchen, I’ll need to install the boost switches, too. Then, when I’m further along in my basement remodel, I’ll install all the basement vents and it’ll be pretty much complete.
I love how this system goes together! With most ERVs, you buy the unit and then figure out on your own how to put it all together, using standard ductwork for distribution. You also could hire a company like Energy Vanguard to design the distribution system for you, and we do a lot of them…unless the client is using Zehnder because there’s really not much for us to do then.
With Zehnder, the distribution system is included, and it goes together easily. It’s also independently ducted, which is a benefit. Many ventilation systems get designed onsite by the installer, and they just connect it to the heating and cooling ductwork. That’s usually a compromise, and you may or may not get the right amounts of ventilation happening where you want it. Independent ducting is better.
There you have it. My weekend Zehnder ERV installation blitz was a blast, and we made a lot of progress. I had played around with the distribution components when I first got the system, but seeing it all go together gave me a real sense of the sheer elegance of this system. And I’m not saying that just because I got it at no cost.
The best thing about this whole thing, though, was hanging out with friends. John, Chris, and Aubrey gave up their weekends to get dirty and sweaty helping me with a project. I’m filled with gratitude for their help and their friendship.
Allison A. Bailes III, PhD is a speaker, writer, building science consultant, and the founder of Energy Vanguard in Decatur, Georgia. He has a doctorate in physics and is the author of a bestselling book on building science. He also writes the Energy Vanguard Blog. For more updates, you can subscribe to Energy Vanguard’s weekly newsletter and follow him on LinkedIn.
Related Articles
Balanced Ventilation for a Not-So-Old House
Basement Renovation in a 1961 Home
Also see Matt Risinger’s video about his Zehnder Q600, featuring the same Chris Smith who helped me.
Comments are welcome and moderated. Your comment will appear below after approval.
Would love to see some installs of these systems on townhomes.
My townhouse (along with many older ones) is 17 feet wide, and the loadbearing joists are parallel to the the 2 outside walls ,leaving not a lot of space between the floor joist and where the concrete foundation wall starts. Also, on these homes the exterior walls – (again only 17 feet) already have a lot of space taken up by windows or ductwork in some stud bays, leaving areas in the house to run the ducts pretty limited.
It would be nice of the joists were floor trusses, then you could run all your mechanicals through the webs, instead of under the basement joists, but such is life.
How is your stairwell designed? I also live in a townhome but our stairs are circular (square-ish) with two landings between both the first-second, and second-third floor. This circularity creates a vertically square tunnel from top to bottom of the townhome and I’ve often imagined running a main trunk down this vertical space with take offs for each floor.
The problem with townhomes is that there’s so much stuff in the way. Plumbing, electrical,
Mine is a more standard build – staircase on the left side against one of the party walls and the two sets are stacked over each other.
An interesting option you made me think of in the future is utilizing an hvac chase which houses some furnace/water heater flues and maybe an AC return duct (haven’t extensively explored it and I sealed it up since it was just an open chase from the crawlspace style flat roof attic to the basement).
If we ever moved off combustion appliances that needed a large metal flue and clearance around it, you can definitely put some erv ductwork in there, although not ideal since it is penetration through the flat roof.
Really looking forward to your future posts regarding the IAQ improvements, after the unit is operational.
Roy: I am, too!
My own experience with the 4 HRVs I installed over 20 years in my 4 of my own houses is that they they are magical. I have been told that ERVs are even more so. I do not want to skew your scientific judgement, so pay no attention to my empirical assessment and give us the numbers as you gather them. Should be very interesting.
Jealous. Really looking forward to how this performs in our chronically damp Atlanta climate.
JC: I’ll be posting data. I do have the ERV exhausting from bathrooms, but I’m not getting rid of the bath fans.
Excellent documentation of the process – almost makes it look simple (almost). I must say your photographer was top notch.
Rhett: Thanks! I took most of the photos, but I need to back and give credit to John and Chris for a few of them.
Awesome to see… thank you for posting this. It was especially helpful to see the manifolds spread out throughout the house, e.g., in the attic, where it made sense. I think we’ll have similar situations on my upcoming build.
Mike: Yeah, being able to put the unit in one place and manifolds somewhere else is a lot more convenient than running all the tubes from the basement, in my case, up through the chase and then across the attic.
Quoting … “In plain language, it doesn’t hit you with blasts of cold air in winter or hot humid air in summer. The cold winter air gets warmed up on its way to you by the heat exchange that happens in the core. C”
I understand how the HEAT transfer takes place (likely via close placement or possibly concentric tubing that allows the heat transfer), but I don’t understand how the HUMIDITY transfer happens. I understand how in the human body oxygen in the air we breathe makes it’s way into the blood stream via tiny capillary action, but I doubt anything that sophisticated is happening withing the ERV.
Assuming the pipe walls are not porous how does the entering humidity in incoming summer air get out? The article say …..”The hot humid summer air coming in gets pre-cooled and dried out a bit on its way in” …. but HOW does this happen? E.g., is it via condensation and removal of the condensed water, and if yes, how ?
Barry: Great question. The capillary core consists of a lot of parallel channels separated by a thin membrane. In a heat recovery ventilator, the membranes are vapor impermeable so only heat transfers through. In an energy recovery ventilator, the membranes are made of a vapor permeable material that allows water vapor to move from the more humid side to the drier side.
Make sense?
Yes …. and Thank you.
Hi Barry. I think it is worth noting that the vapor permeable material in an ERV core is less thermally conductive than an HRV core. Therefore, an ERV has a lower heat recovery efficiency than an HRV. But in a humid climate it makes sense to forfeit the highest heat recovery efficiency in order to reap the benefits of humidity transfer from the more humid airstream to the less humid airstream.
Also, lower fan speed = slower airflow = more time for heat/humidity recovery = higher efficiency. So, it makes sense to run an H/ERV at the lowest speed that provides acceptable indoor air quality.
And a followup to your last sentence, John, is that you need to specify what may seem like an oversized ERV to be able to run it at lower speed. At Energy Vanguard, we generally specify an ERV with twice the maximum air flow rate we want to run continuously. That also provides room to have boost mode with switches where the extract vents are.
I have my ERV outdoor hoods placed about 8′ apart. I’ve noticed inside odors making their way back in.
For example; We had a scented candle lit in a bathroom with a stale air intake, and the scent was being delivered through the fresh air supply’s throughout the house. You could smell the candle like it was infront of you, on the opposite side of the house. It was almost like the system was in recirculation mode, but wasn’t.
I’m not sure if this is the enthalpy core, or the hood separation distance, or an imbalance in my fresh/stale air. I’ve balanced with a manometer to try to rule out the latter with no success.
I measure the CO2 levels in the house, and the ERV is proving to be essential for keeping CO2 levels down to non-alarming levels in a 0.80ACH50 house. Occupancy and ERV fan speed settings have a major impact on CO2 levels.
I’m using a Lifebreath 170ERVD, which is not the premium product the Zehnder is.
I’d be curious if you notice anything similar when you put yours in commission.
I’d recommend keeping those outdoor hoods well-separated if you can.
And I’d recommend a CO2 monitor to measure the performance!
Oh, the air will be awesome.
No concerns about the EPP supply and exhaust pipes?
Btw, are you employing any make-up air strategies for the bath fans? Will the Zehnder ERV provide any?
Very happy for you and your family!!
Allison,
I am a bit surprised that you did not exhaust from the laundry room which could be [not always] a source of high humidity [re: article: high humidity = source for bad stuff to grow].
While it takes very little energy, = 100 watt light bulb, to run the ERV have you calculated the COST of heating/cooling the ventilation air per year?
I, too, am in the Atlanta area, but Zehnder does NOT have a dealer in the area.
How are you going to commission the system when finished? And what should this cost be?
When I called Zehnder in NH, since they have no dealer in my area, their offer was “send us the money, trust us and good luck”
I have contacted Energy Vanguard to design my zoned, Water Furnace GSHP System.
Your choice of words to describe an ERV is not quite right. They don’t extract stale air. They just extract air–specifically indoor air–which may or may not be stale.
Perhaps we could all agree with some proxy or working definition for stale vs fresh, but the word stale is ambiguous, and will mean different things to different people.
miner: stale = methane/low-oxygen
dry climate: stale = high particulates/CO2
humid climate: stale = humid AND high particulates/CO2
And while indoor air is usually more “stale” than outdoor air, that’s not always the case. Matt McLagan identified an issue where his intake is not noticeably fresher than his exhaust. More generally, some regions have days/times with low air quality, and sometimes doctors recommend staying indoors. On those days, the intake air would be more “stale” than the indoor air you’re exhausting.