Building Your First House as an Owner-Builder
Building your first house as an owner-builder can be hectic, nerve-wracking, and wildly exhilarating. I experienced all those things and more when I built a house for myself 20 years ago. I’ve written a bit about it here in the Energy Vanguard Blog, but not for a while. I’m going back to this topic now because of four things.
First, it’s the 20th anniversary and it’s November, which was the most exciting month of all during my two years of building the house. Second, I’ve had to go back and find photos to put in the building science book I’m writing. Third, I had a call this weekend with someone whose book helped me understand the logistics of contracting your own home. And fourth, I also spoke with the builder I hired to help me run the show during that critical period from having a foundation in the ground to being dried-in.
If you’re building your forever house, as I was, let me share with you what my experience was like and give you some pointers.
Planning, planning, planning
When you embark on this project of building your first house, you need to spend more time on planning. Yes, you’ve got to have house plans. You also need a plan for getting all the materials you need. You need a plan for hiring workers and trade contractors. You need a plan for dealing with the building department and the bank. And you need a plan for the unplanned…as much as that’s possible.
The problem is that this is the first time you’re building a house. In my case, I’d never built anything larger than a bookcase, but I got the project to the finish line. The main thing I would change if I could go back is to spend more time planning. I thought the project was going to take two months once we started building walls. I was wrong. It took nearly two years. If I had delayed breaking ground for six months and done more planning, I could have cut the construction time and saved money, too.
From foundation to dried-in
The problem was that I’m the kind of person who jumps in and then figures out how to swim. So we began shortly after getting the building permit in September 2001. (Yes, that month. It was a weird time.) We got the hole for the basement dug in late September, had our basement walls a month later, and were ready to start framing at the end of October.
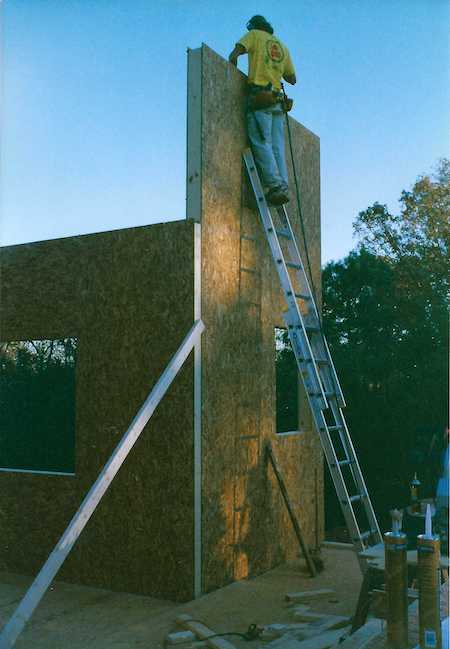
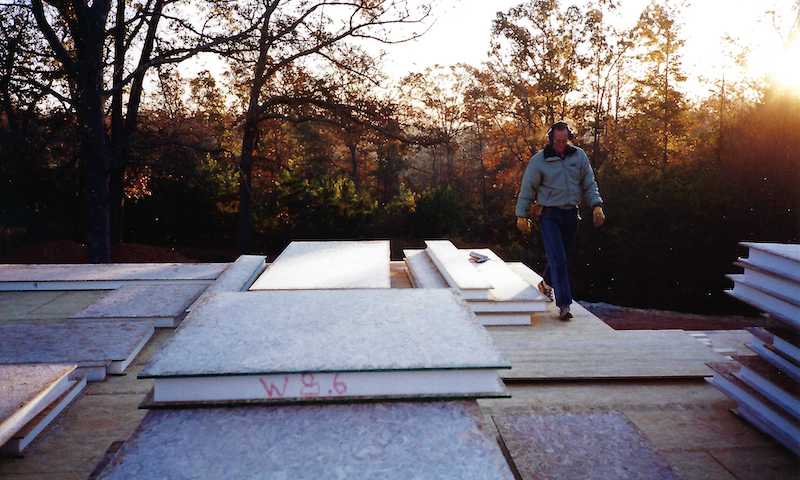
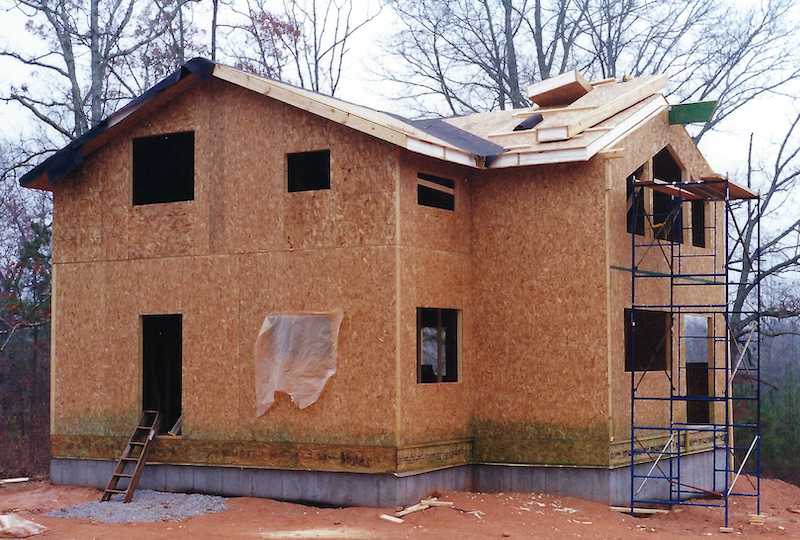
Our structural insulated panels arrived on 29 October, and we started erecting the walls the next day. That’s Steve Tyree on the ladder in the above photo. He drew our panel plans and helped as a SIP consultant to get us started. (That’s him in the lead photo, too.) It’s hard to know which day during the whole two-year project was most exciting because there were so many (along with a few depressing days). But starting with those first floor walls would certainly be in the top three.
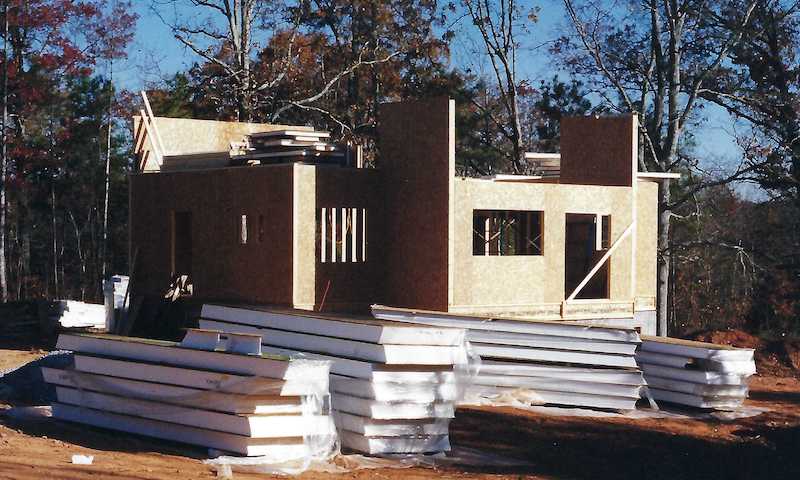
It took about a week to get the first floor walls done and then put in the second floor I-joists. In the photo above, we had started on the second floor walls. You can see a short section of it on the back of the house.
There’s a story with that back wall, too. We got about half of it installed and then had to tear it down. The panels came pre-fabricated so that the openings for all the windows and doors would be in the right places. Of course, that depends on installing the panels facing in the right direction. As we got to the second window opening of that wall, I looked at the plans and noticed the openings weren’t in the right places.
Oops! Add a day.
The walls went up quickly. Setting the roof panels took almost as long. The back side was relatively easy. The roof panels, being thicker than the walls, took more work getting them mated securely. The front of the roof was harder. It had two valleys, which meant cutting a lot of bevels on the splines. More than once we had to send a panel back to the ground because we cut the bevel wrong.
Oops!
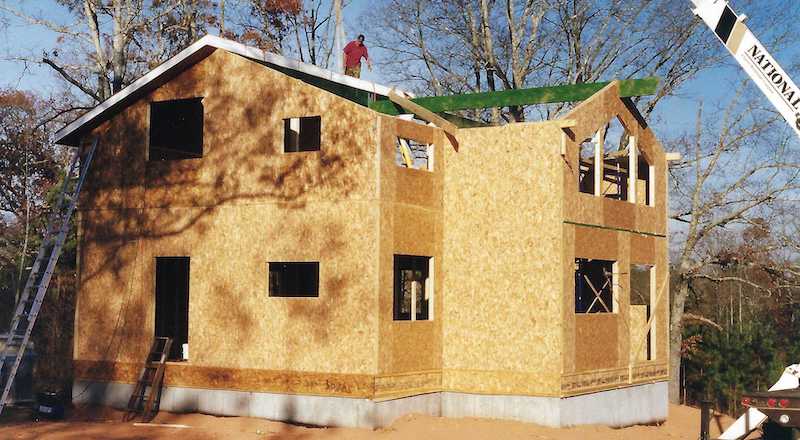
Ah, the roof is almost finished. Except there’s a story with those two panels sitting up there. Those panels weigh about 150 pounds each, and we had to place them out on the end of the prow roof. That meant the majority of each panel cantilevered over the gable end. The top and bottom of the panels attach to the ridge and eave beams.
We aborted our first attempt. None of us felt confident in the wimpy rope and ratchet strap we were using to drop the panel over the edge. So I ran to the big box store and bought a one ton come-along, a heavy duty ratchet strap, and some better rope. Although it was still scary to push that first panel over the edge, we avoided catastrophe and got them set.
Whew!
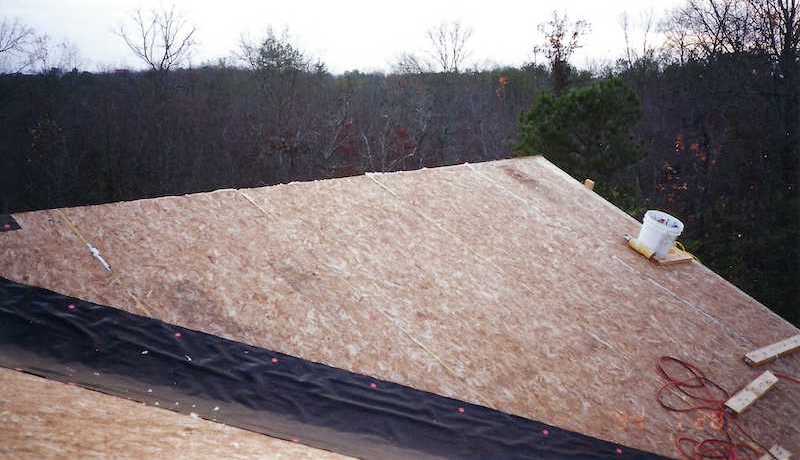
With all the roof panels in place, the last step before getting felt on the roof was putting in the rest of the long screws that secured the panels to the wall framing and ridge beams. On Thanksgiving day 2001, I spent the whole day up on the roof by myself screwing down the panels. Then we went to my friend Perry’s house and had a nice meal.
The long stretch: From dried-in to living-in
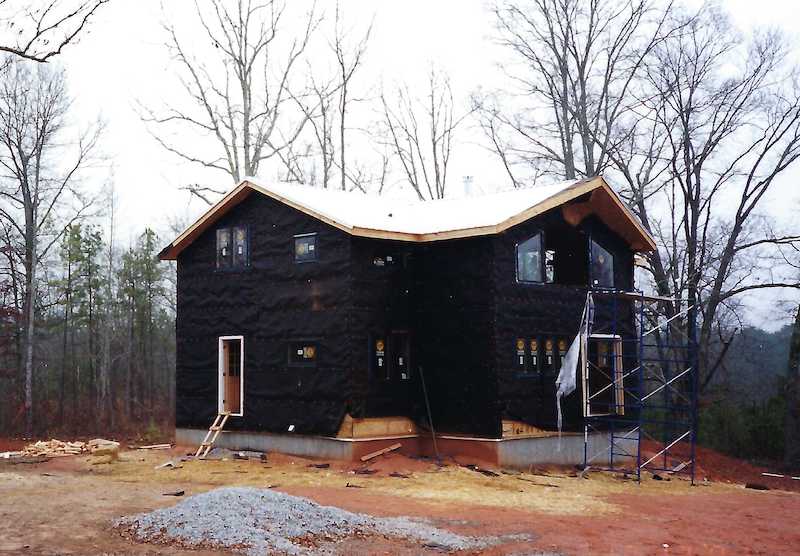
By mid-December 2001, we had the house dried in. I thought we were almost done. Oh, how wrong I was. (Have I mentioned it took two years?)
I won’t give you a blow-by-blow of everything that needed to happen, but here’s a snapshot at how things progressed:
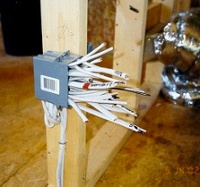
Winter 2001-02. Did interior framing, back porch, front porch, and carport. My dad died in January, which set me back in more ways than one. We also had started the electrical work in the fall and that continued.
Spring 2002. Got the siding installed and did most of the exterior painting. Doing some of the painting myself in May 2002 was great therapy. Wiring continued.
Summer 2002. I framed the interior stairs (finally!) Put screen on the back porch. Started installing the tongue-and-groove ceiling on the interior. Wiring continued. Got drywall in early July. Started doing tile floors. I worked full time on the house.
Fall, winter, spring 2002-03. I was teaching physics at a local university so things slowed down. Continued with lots of details: trim carpentry, flooring, woodstove…
Summer 2003. Installed the greywater system and composting toilet, after an ordeal with the environmental health department. Installed cabinets, lights, plumbing fixtures, and all those other things that go into a house. Again, I worked full time on the house for the whole summer.
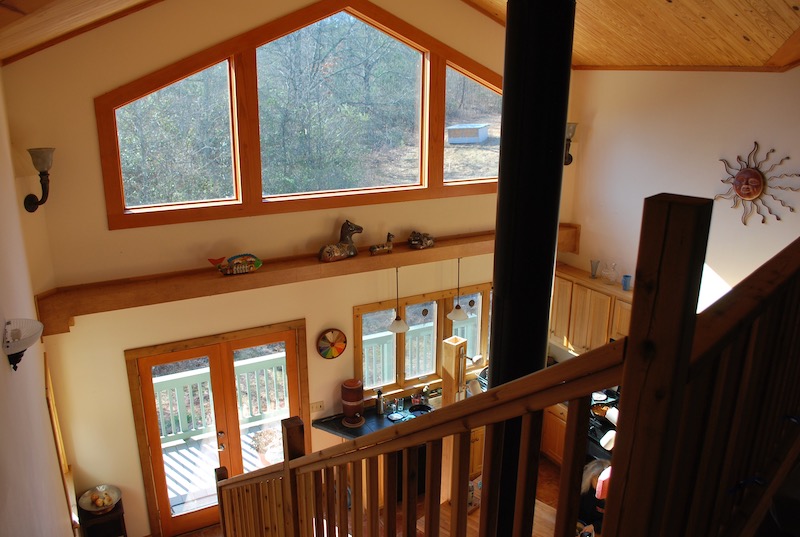
In August of 2003, we got our final inspection and moved in. Hooray! It was a cheery house with lots of light. I designed it with passive solar features that worked well. (This may be the only house in Georgia with trigonometry done on the interior wall studs.)
Advice for new owner-builders
I’ve already given you my most important advice: Do more planning. Delay the start if necessary. But I learned a lot more, too. When I first embarked on the project, I did two things. I took a weekend homebuilding class at Southface and bought a book called The Complete Guide to Contracting Your Home.* Those both helped immensely. (The third motivating factor I mentioned at the top of the article was talking with the author of that book this weekend.)
Here are some other tips:
Get to know the suppliers in your area. Some are more helpful than others. Find a place (or places) that will not only can sell you materials but also connect you with other people. I bought most of my materials from Home Depot, and the crew at the Carrollton pro desk were super helpful.
Buy the tools you need. I made the mistake of renting some things at first before I finally bought them. I could have saved money by buying them upfront. Of course, this doesn’t apply if you’re subcontracting everything. I did a lot of the work myself, with hired laborers sometimes.
Get help with the framing. If you’re planning to contract the house and do a lot of work yourself, get yourself an experienced framer to help if you haven’t done it before. Dan Shaw was a builder and carpenter who was essential in helping me go from foundation to dried-in.
Find a good all-around contractor. For me that was Bright Construction from Franklin, Georgia. They wrapped the house with felt, installed the windows, framed the carport and back porch, and put up some of the tongue-and-groove ceiling. They were a great resource!
Plan on it taking longer than you think. I know everyone says that, but it probably will. Hofstadter’s Law says so: “It always takes longer than you expect, even when you take into account Hofstadter’s Law.” I thought it would take about two or three months. Instead it took two years.
Plan on it costing more than you think. I don’t know if there’s a financial equivalent of Hofstadter’s Law, but there should be. I made decisions all along the way that cost me more than I had planned. (The tongue-and-groove ceiling was one of them.) And one thing that makes it cost more is when it takes longer. The bank charges interest on that construction loan every month. But hey, this was going to be my forever house, so I wasn’t about to skimp.
Epilogue
I absolutely loved building my own house, my forever house! The planning phase was exciting because I could imagine it all coming together. The sitework and framing was my favorite part because we went from bare land covered by weeds and privet to a hole in the ground to a foundation to something that looked like a house. The last year and a half had its ups and downs, but just seeing the house develop at every stage of the way gave me great joy.
Yeah, there were low moments, but the satisfaction of seeing it all come together, the feeling of accomplishment, is something I’ll always remember. Even though it didn’t turn out to be my forever house. I lived it for three years, and it was the most comfortable, energy efficient, inspiring house I’ve ever lived in.
There was a while when I thought I’d get the chance to build another house. I wanted the chance to do it all over again without making the mistakes I made the first time around. Two years ago, however, I bought a house that I love. My wife and I have been fixing it up, and it’s going to be our forever house. (Right?)
Allison Bailes of Atlanta, Georgia, is a speaker, writer, building science consultant, and the founder of Energy Vanguard. He has a PhD in physics and writes the Energy Vanguard Blog. He is also writing a book on building science. You can follow him on Twitter at @EnergyVanguard.
Related Articles
Green Home Building, a page with a description of the house and links to other articles about it
My New Project: A 1961 House With Home-Performance Angst, the home I live in now
How to Fix a Leaky, Underinsulated Exterior Wall, a bathroom remodeling project in the condo I lived in 2008-19
* This is an Amazon Associate link. You pay the same price you would pay normally, but Energy Vanguard may make a small commission if you buy after using the link.
NOTE: Comments are moderated. Your comment will not appear below until approved.
This Post Has 10 Comments
Comments are closed.

Dr. Bailes,
If you were going to do this again would you buy stock house plans and either upgrade* or possibly buy plans which are “Green” or have EnergyStar seal?
I keep reading about people who wish to build a green home but go off the reservation in terms of design in order to try to save $$.
*Example: Rain screen detail, better performing windows, etc.
JC, I’m not a stock-anything kind of guy, but I would do the plans differently. Instead of doing the design myself and getting a young architect to help with some of the sticky points, though, I’d have an architect do the design with input from me. The main things I’d do differently are:
1. More planning
2. Better moisture management details at the openings
3. Better air sealing on the roof with a self-adhered membrane
4. Spray foam on the band joist
5. Much better HVAC design!
6. Single story on a finished basement instead of 2 stories on an unfinished basement. That would have saved a lot of money.
The HVAC contractor I hired was good compared to other contractors and did an actual Manual J. He installed a 3-ton heat pump for 3,000 sf, which is 1,000 sf/ton. The actual load was more like 1.5 tons, though.
Surprised you used felt- maybe Tyvek was not available at the time? Was thinking Tyvek was the better product?
PS: Im anti basement, have seen too many issues w/dampness/mildew etc…………..and have never had a plumbing issue within a slab.
George, Tyvek and similar house wraps were around at the time. I don’t recall why I chose felt for the WRB.
I’m pretty sure that basement has stayed dry the entire 20 years. It certainly was still dry when I moved out in 2006. We got real waterproofing done: elastomeric coating followed by a drainage mat and the foundation drain was in a trench next to the footing, not sitting on top of it.
@George, nothin’ wrong with building felt. Before I built my first home back in Charlotte (similar time frame as Allison), I hired Lstiburek to advise on wall design. He recommended 2 layers of felt paper (15#) overlaid by vertical strips of sill-sealer 24-oc to create drainage plane, followed by a layer of XPS.
Sure, Tyvek was available back then but installed cost was a lot higher and felt paper works just fine. House wraps are ubiquitous now, perhaps because lots of competition pushed prices down. Today, house wraps are more like a commodity than a novelty.
That home also had a finished basement (as does my current home in SE Arizona). Finished basements are great! Poorly constructed basement are not so great. You just gotta know what you’re doing.
One reason I love my basements is access. I installed suspended ceilings in both of my basements so I can easily add/change/repair plumbing, wiring & mechanicals, forever. You gotta love that! But I’m told those ceilings no longer allowed by code. That’s a shame.
Basements also make it a lot easier to bring air handler and ducts inside conditioned space. My ductless whole-house return in basement mechanical room keeps air well mixed between floors, even when there’s little or no load in the basement. Moreover, it’s easier to route ducts through the open web floor trusses when there are no return ducts. That also means less costly duct system and less blower energy. What’s not to love?
Now that I read your comment, David, I think the reasoning behind my choosing felt was that the instructor told us that same thing in the Southface class I took. Good old fashioned felt can work just fine and is a lot less expensive. I never worried about that as my choice of WRB. What I did worry about is the limited flashing I did around the windows and doors and at the roof-wall intersection. Most of the openings are protected by overhangs, though, so it’s the roof-wall intersections that are probably the weakest point.
Hey Allison, what made you move from Carrollton to Decatur?
Tim, before I got divorced in 2006, a lot of my work was coming from Atlanta. Moving into the city instead of driving an hour each way (with no traffic) was a no-brainer. And as much as love being in the country, I’m really a city person.
I was in Texas for 35 years and virtually never saw a residential basement. After being in the Chicago area now for almost 30, I don’t think I could ever have a house without a basement. We’ve been in our new construction build for 11 months. We GC’ed ourselves and did a lot of work but not as much as you did. Having everything accessible from the basement, all the plumbing, electrical, HVAC makes it so much easier. There’s is virtually nothing in the attic, except the plumbing vents and some lighting conduits. Your six points above are all good advice, I think I got 2-6 right!
I have my Texas lake house build coming in a few years and it will have a basement just not sure how I’ll get that done at this point. It’s been mentioned to a couple of contractors and I get blank stares. By contrast the neighbor two lots over just completed home construction and spent almost $20k bringing in loads of soil to get a level foundation start. Floating a slab on disturbed soil doesn’t end well and $20k will I’m pretty sure will build a 1500sqft basement.
What did you end up with for R-values, and window specs? Did you do a blower door test?
Lee: Most of the walls had 3.5″ of expanded polystyrene (EPS) in them for about R-14 of insulation. The two sheets of OSB, the interior drywall, and air films brought the center-of-panel R-value up to about R-16. The roof panels had 7.25″ of EPS for R-29 of insulation. The windows were mostly U 0.35 and SHGC 0.31. The blower door test result was ~840 cfm50, which I think came out to ~1.7 ACH50.